User Interface
User Interface
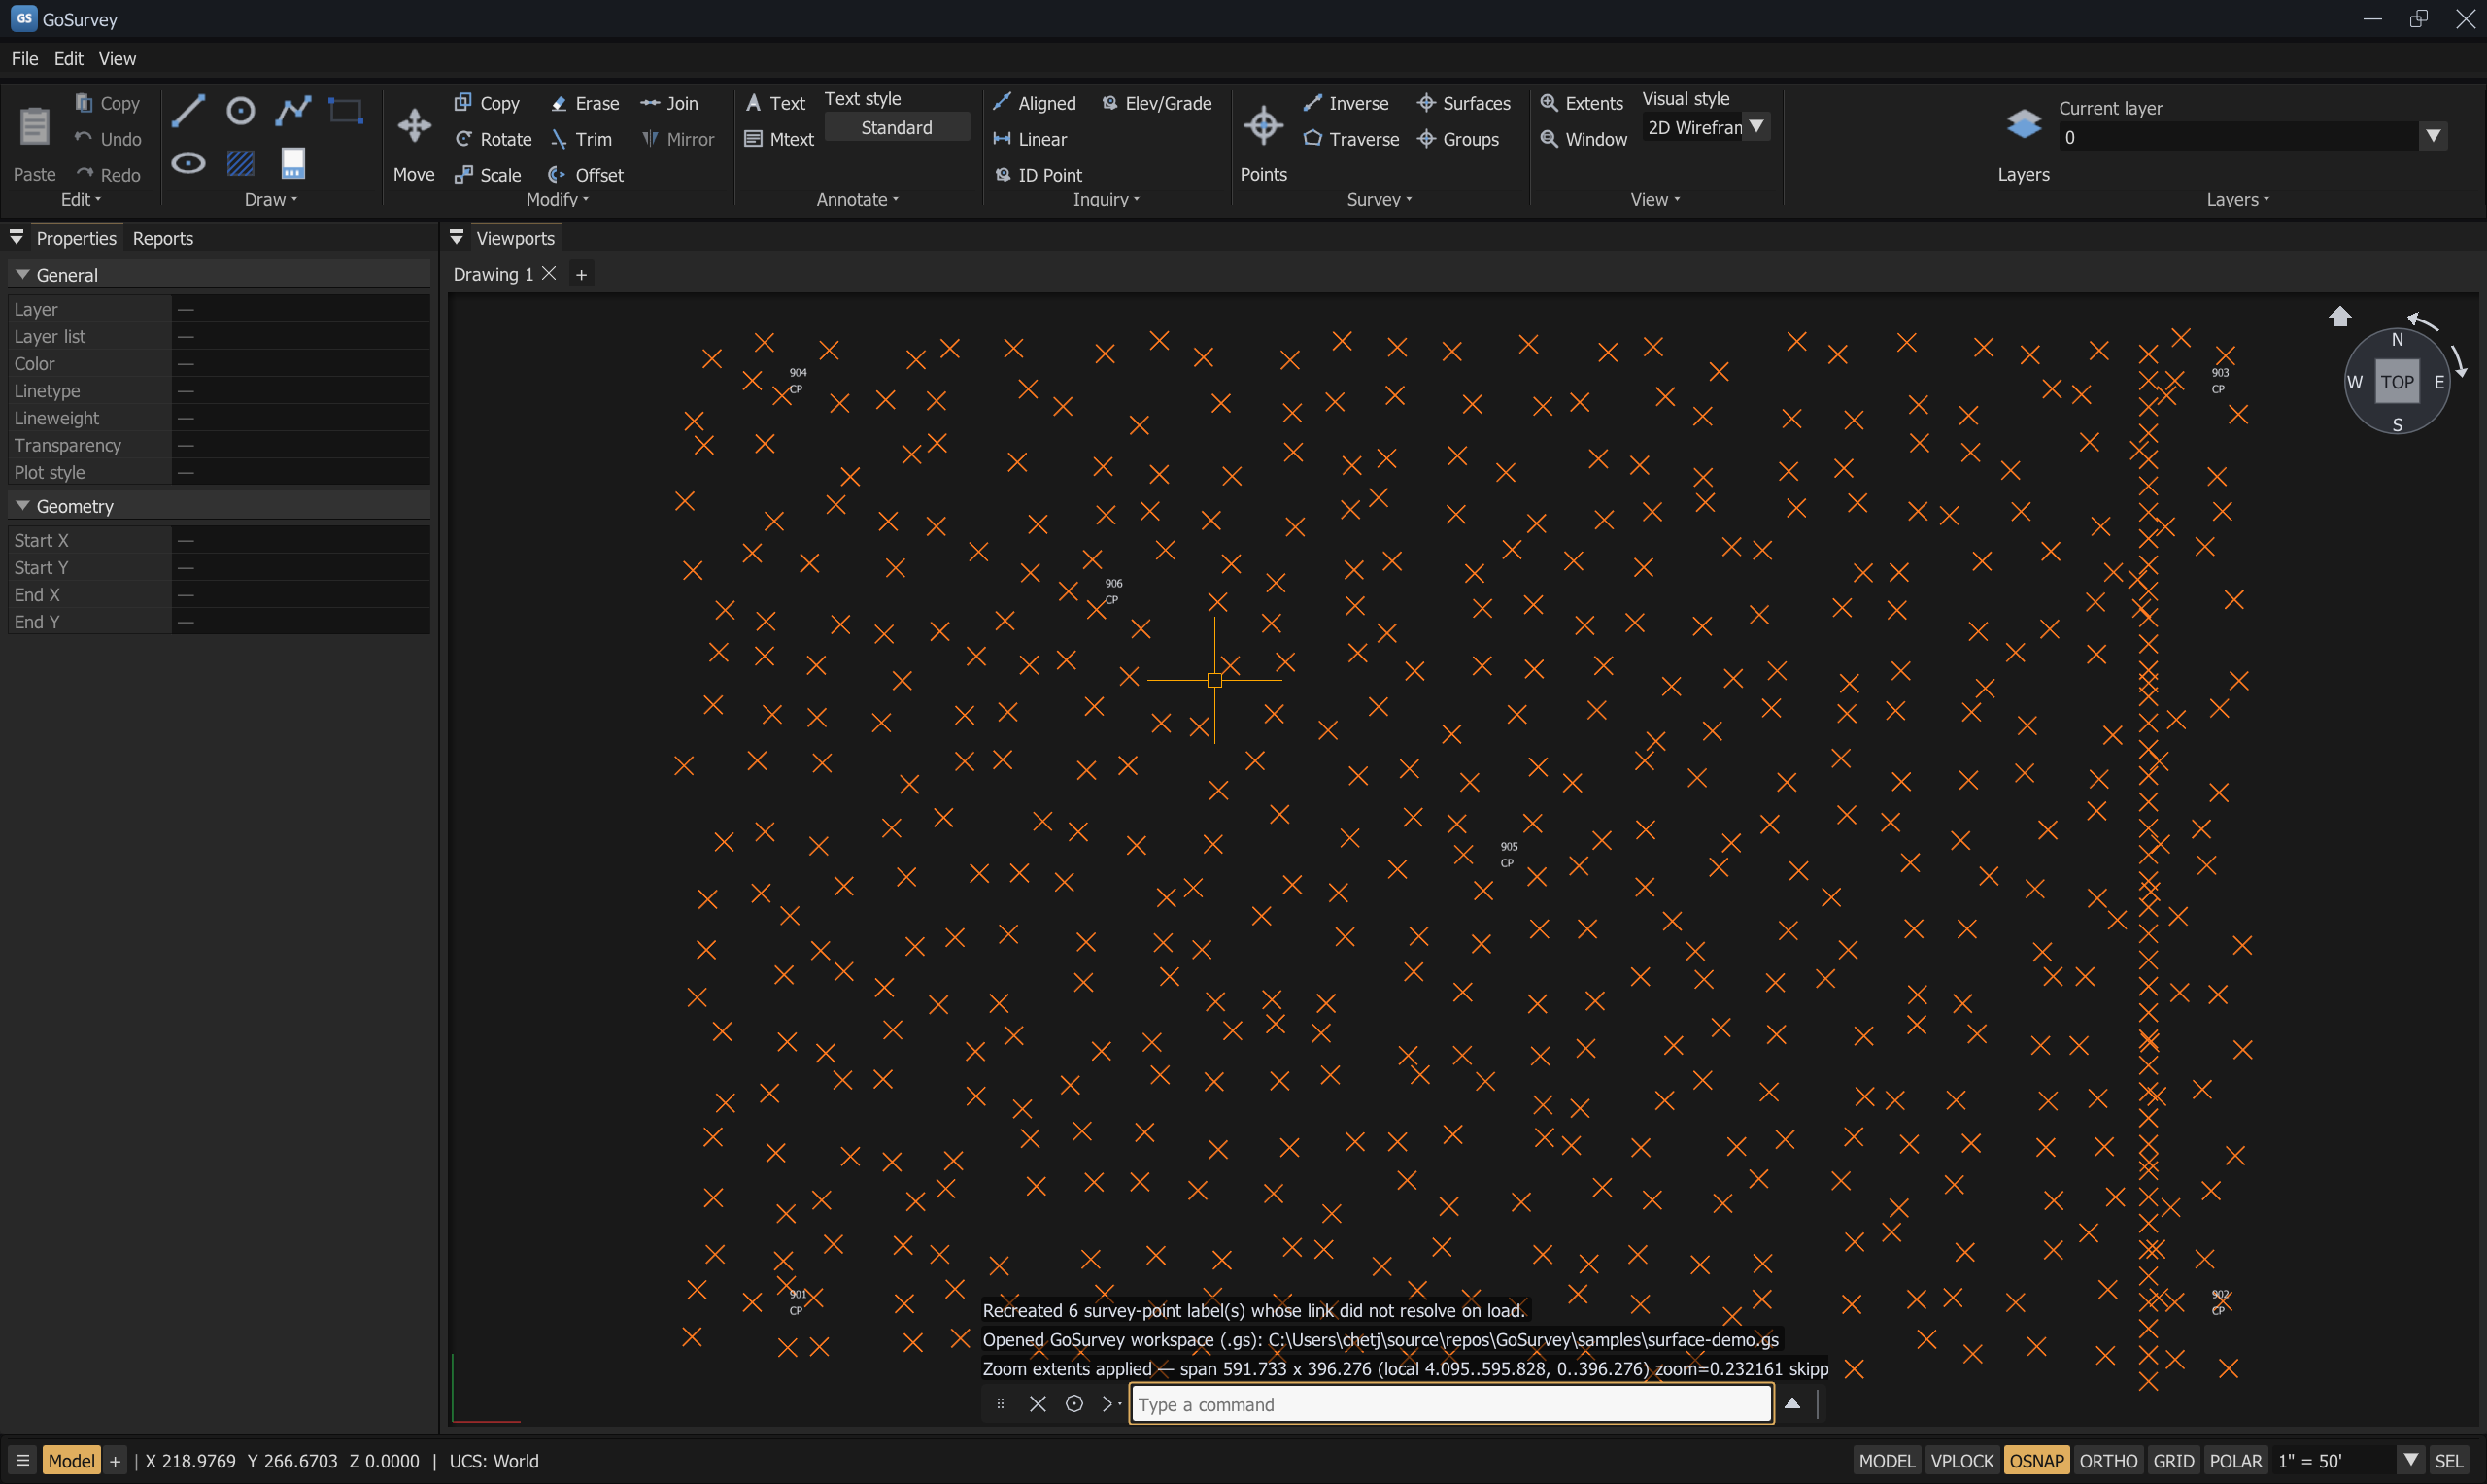
The main window with a survey point set loaded: ribbon on top, Properties docked left, the floating command bar over the viewport, the ViewCube top right, and the status bar along the bottom.
The window is laid out top to bottom: menu bar, ribbon, drawing tabs, drawing viewport (with the Properties / Reports panel docked left), command line, and the status bar across the bottom.
Menu bar
Only three menus. Almost everything else is on the ribbon or the command line.
File
| Item | Shortcut | What it does |
|---|---|---|
| New | — | Opens a new empty drawing in a new tab |
| Open | — | Opens a .gs drawing in a new tab |
| Save | Ctrl+S |
Saves to the current path; prompts for one if there is none |
| Save As… | — | Saves under a new name and renames the tab |
| Import DXF… | — | Replaces the CAD geometry from a DXF; keeps survey points (Import and Export) |
| Export DXF… | — | Writes an ASCII DXF (AC1032) |
| Import DWG… | — | Needs an external converter; greyed out if none is installed |
| Export DWG… | — | Needs an external converter; warns about what is lost first |
| Quit Application | — | Prompts if any tab has unsaved changes |
Note — the DWG items stay disabled until a converter is found. Hover them and the tooltip reads: DWG needs a converter: install the free ODA File Converter, or set
GOSURVEY_DWG_CONVERTERto ODAFileConverter.exe or accoreconsole.exe.
Edit
| Item | Shortcut |
|---|---|
| Copy | Ctrl+C |
| Paste | Ctrl+V |
| Paste at Original Coordinates | — |
| Undo: <last action> | Ctrl+Z |
| Redo | Ctrl+Shift+Z |
The Undo item names the action it will reverse, for example Undo: Edit hatch.
View
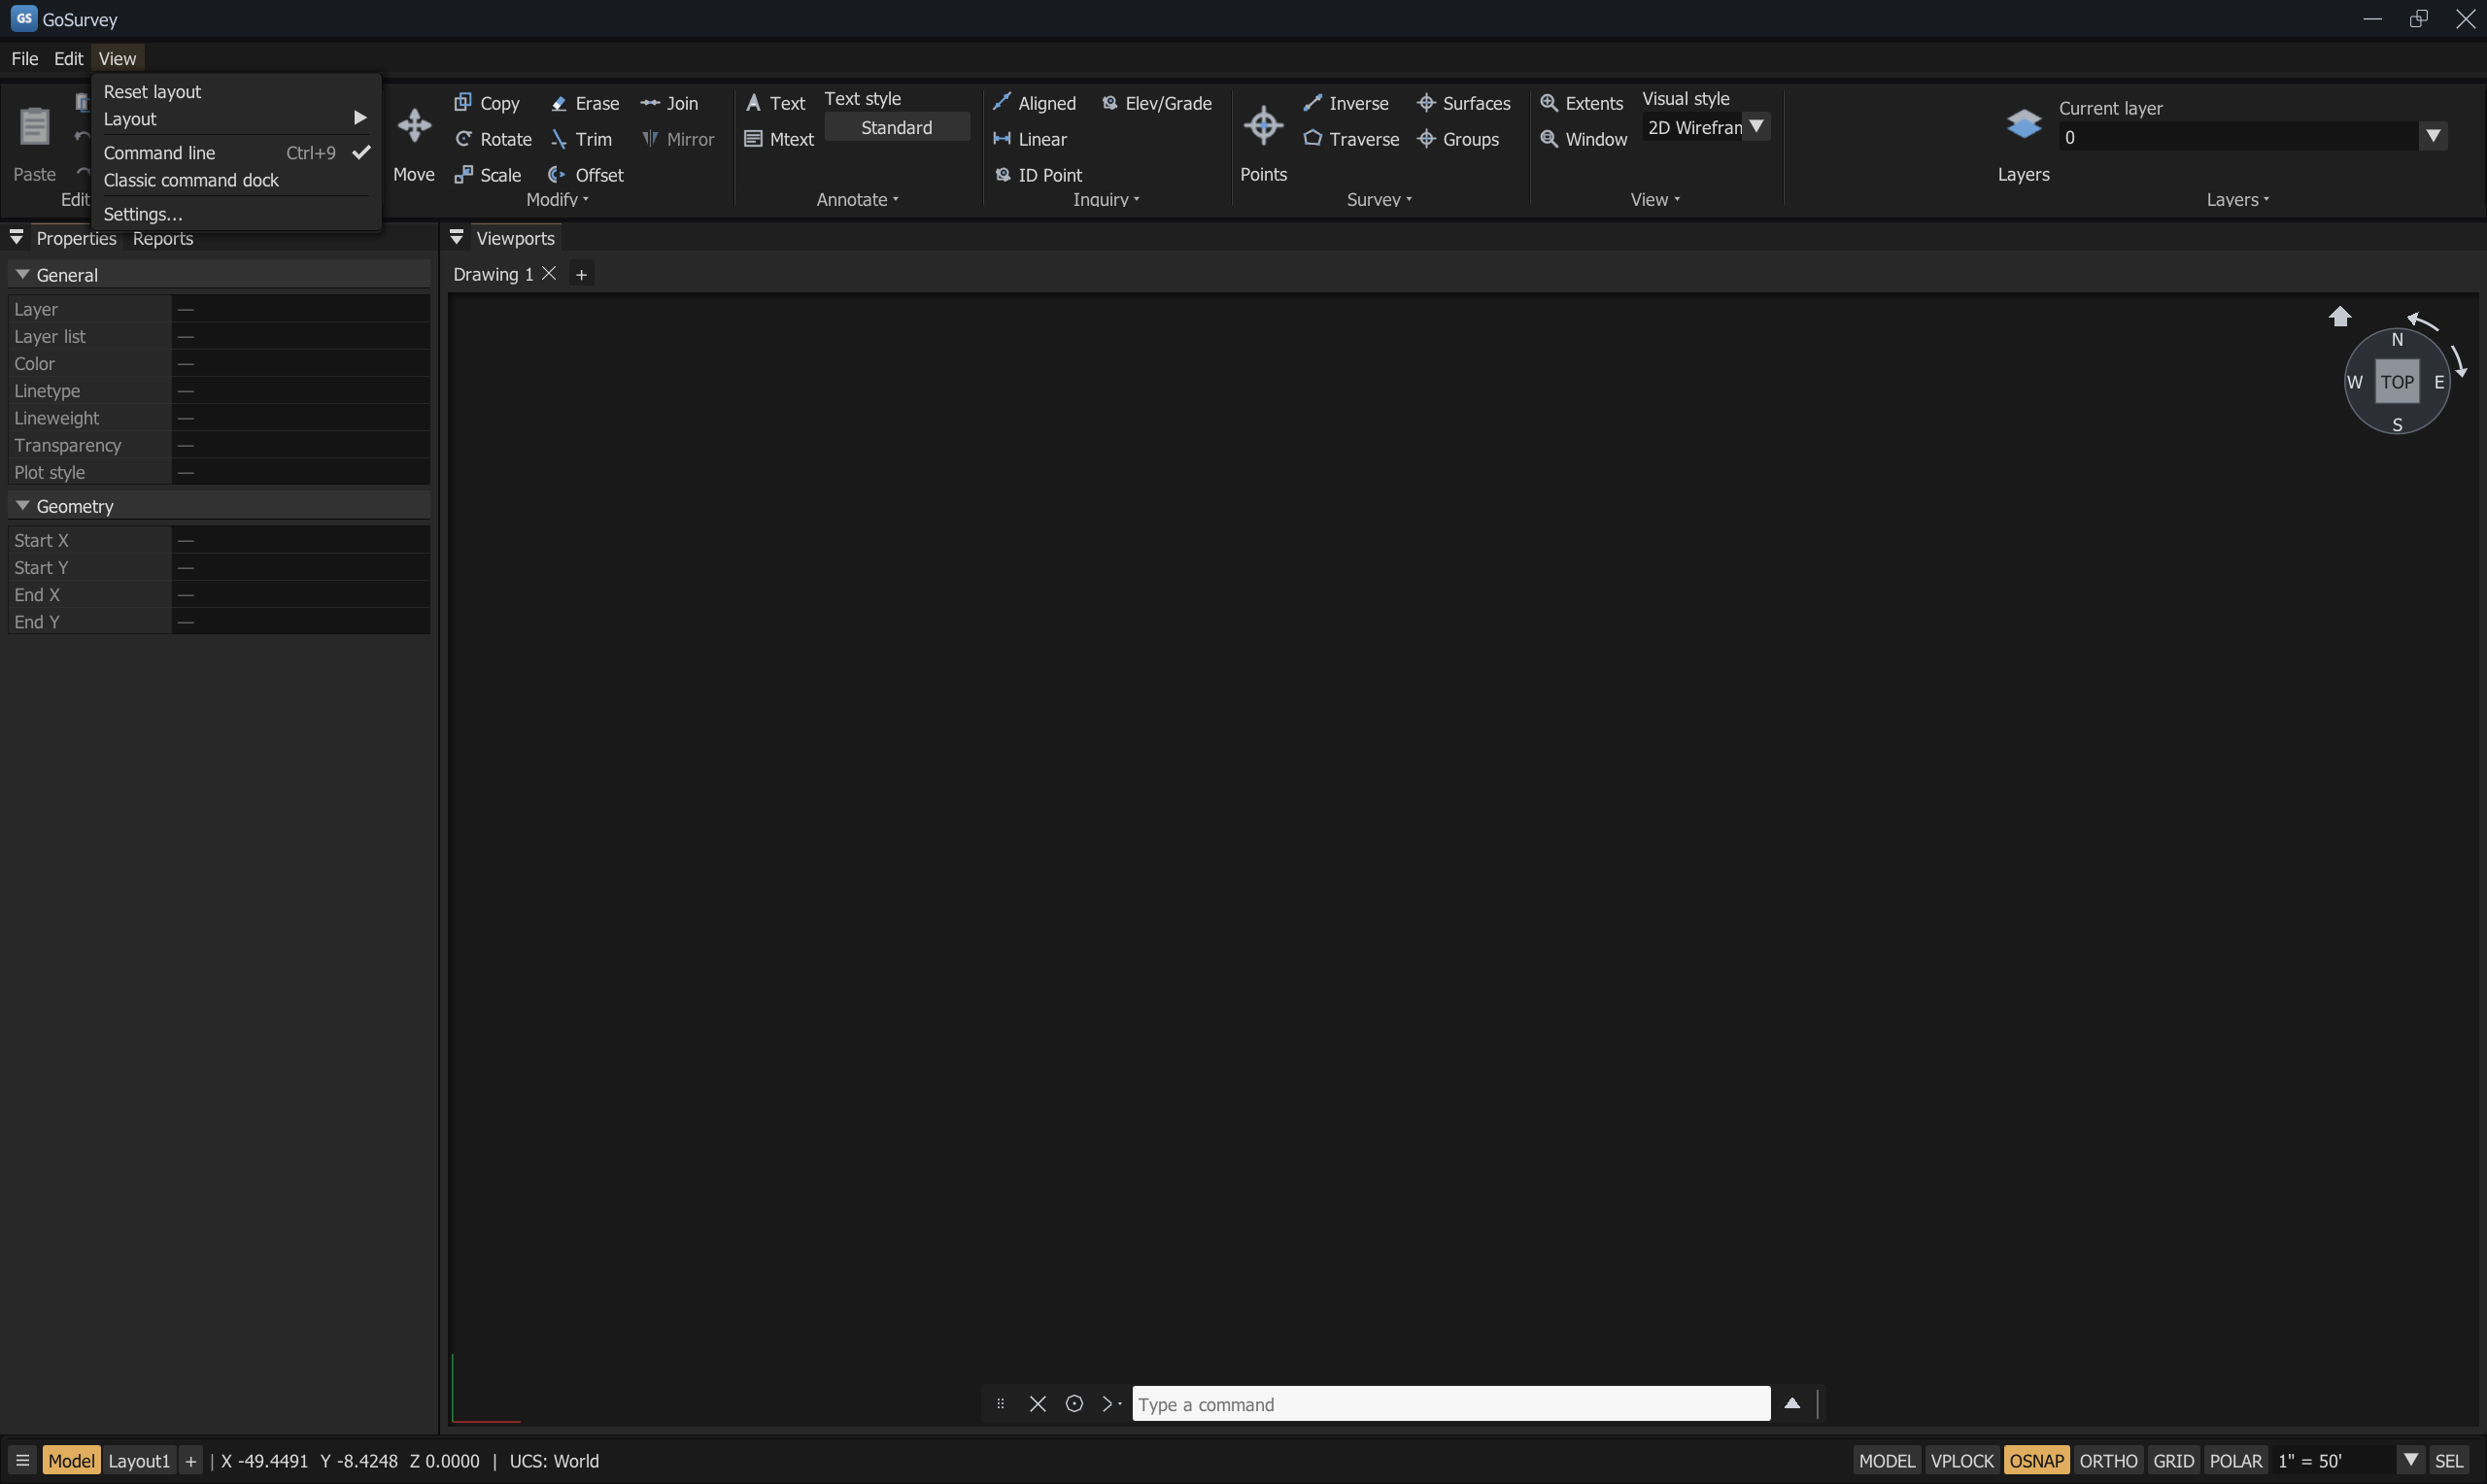
| Item | Shortcut | What it does |
|---|---|---|
| Reset layout | — | Restores the built-in panel arrangement |
| Layout ▸ Save current as… / Switch to | — | Saves and recalls named panel layouts as .ini files |
| Command line | Ctrl+9 |
Shows and hides the floating command bar |
| Classic command dock | — | Switches the command line between the floating bar and a docked panel |
| Settings… | — | Opens the Options dialog (Settings and Options) |
Ribbon
Sections change with what you are doing. In model space you get:
| Section | Contains |
|---|---|
| Edit | Paste (large), Copy, Undo, Redo |
| Draw | Line, Circle, Polyline, Rectangle, Arc, Ellipse, Hatch, PDF Attach |
| Modify | Move (large), Copy, Rotate, Scale, Erase, Trim, Offset, Join, Mirror (disabled) |
| Annotate | Text, Mtext, and the Text style flyout with thumbnail previews |
| Inquiry | Aligned dimension, Linear dimension, ID Point, Elev/Grade |
| Survey | Points (large), Inverse, Traverse, Surfaces, Groups |
| View | Zoom Extents, Zoom Window, and the Visual style dropdown |
In a paper layout the Draw/Modify/Annotate/Inquiry/Survey sections are replaced by a single Layout section: Rect VP, Poly VP (disabled), Plot, Batch. Double-click into a viewport (floating model space) and the normal model ribbon comes back.
Two sections appear only when they are relevant:
- PDF Underlay — when a PDF attachment is selected: Background toggle, Vectorize, a Fade slider, and per-underlay snap toggles (Lines / Circles / Text).
- Hatch — while HATCH is running, or when hatches are selected: pattern, colour, transparency, layer, angle, scale. With hatches selected the controls edit them live and undoably.
On the far right is the Layers section, with the Current layer dropdown. New geometry is created on whatever layer is shown there.
Hover any ribbon button for a tooltip that says what it does and gives the command-line equivalent. Tooltips can be turned off in Settings → Display.
Drawing tabs
Above the viewport. Each tab is an independent document — geometry, layers, survey points, paper layouts, plot scale, and undo history are all per-tab. Switching tabs switches all of it.
Tabs can be hidden with Settings → Display → Display File Tabs.
Drawing viewport
The drawing area. A CAD crosshair replaces the mouse pointer inside it.
| Input | Action |
|---|---|
| Middle mouse drag | Pan |
| Mouse wheel | Zoom, cursor-centred and smooth. The per-notch factor is set in Settings → Display |
| Left click | Pick a point, or select an object |
| Right click | Repeat the last command, or open the shortcut menu — see Object Selection |
| Shift + right click | One-shot object-snap override menu — see Object Snaps |
| Double-click a viewport (paper space) | Enter floating model space |
| Double-click an MTEXT | Open the in-drawing rich-text editor |
A minor grid follows the view when GRID is on. While a command expects a point, dynamic input fields track the crosshair.
ViewCube
A cube in the corner of the viewport, model space only — a paper sheet is 2D and has no orientation to show. Click a face — TOP, BOTTOM, FRONT, BACK, LEFT, RIGHT — and the view eases to that orientation rather than jumping. See Views and Navigation.
Properties / Reports panel
Docked on the left, two tabs.
Properties shows and edits the current selection:
- General — layer, colour, linetype, lineweight, transparency, plot style. With nothing selected it shows the current text style and the default text height (in) used for new TEXT and MTEXT.
- Geometry — fields for the selected object type: start and end X/Y for a line, centre and radius for a circle, insertion and rotation for annotation, and so on.
- Selecting several objects of one type shows the shared fields with
(mixed)where they differ; typing a value applies it to all of them. A mixed-type selection shows a count summary instead. - Selecting a survey point shows its ID, coordinates, elevation, description, layer, and label
style. Bulk editing is done in
VIEWPOINTS. - Selecting a PDF underlay shows its file, page, insertion, scale, rotation, fade, and snap toggles.
Reports collects generated reports as tabs: ALIGN transformation reports, traverse results, and exported-point reports. They appear here automatically when the command that produces them runs.
Full detail: Properties
Command line
By default a floating bar near the bottom of the viewport, with:
- a log of everything the program has told you (it fades when idle),
- an input box with fuzzy autocomplete,
- a hint line showing what is valid at the current step, with clickable
[OPTION]links.
F2 opens the full-height console view. Ctrl+9 hides and restores the bar. The classic docked
panel is available from View → Classic command dock.
Pressing Enter submits the command input from anywhere — you never have to click into the box first.
Full detail: Command Line
Status bar
Bottom of the window.
Left side
| Element | What it does |
|---|---|
| ☰ hamburger | Layouts and spaces menu: Model space, each paper layout, New paper layout |
| Model / layout tabs / + | Switch space; + adds a layout. Right-click a layout tab for Rename, Move or Copy…, Page Setup Manager…, Viewports…, Delete |
| X / Y / Z readout | Live crosshair coordinates at the display precision set in UNITS |
| UCS: World / UCS: Elev <z> | The current work plane. Shows World on the world XY plane, otherwise the elevation new geometry will be drawn at |
Right side
| Button | What it does |
|---|---|
| MODEL / PAPER / FLOAT | Current space. Click to toggle model against the current layout. FLOAT means you are editing the model through a viewport — click it, or press Esc, to leave |
| VPLOCK | Viewport zoom lock. ON = pan and zoom always move the sheet. OFF = while editing a viewport in place, pan and zoom adjust that viewport model framing |
| OSNAP | Object snap on and off (F3). Right-click it for the snap-type checklist |
| ORTHO | Ortho constraint on and off (F8) |
| GRID | Drawing grid on and off |
| POLAR | Polar tracking — the button toggles but has no effect yet |
| Plot scale | Annotation-scale dropdown, e.g. 1" = 50'. Same as PLOTSCALE |
| SEL | Opens the Selection panel, which lists the selected entities so you can toggle each one |
Dialogs and panels
These open as separate windows.
| Window | Opened by |
|---|---|
| Options | View → Settings… |
| Drawing Units | UNITS / UN / DDUNITS |
| Layer Manager | LAYER / LA |
| Text Style Manager | STYLE / ST / DDSTYLE, or ribbon Text style flyout → Manage Text Styles… |
| Create points | CREATEPOINTS / CRTPTS, or ribbon Survey → Points |
| Viewpoints — survey database | VIEWPOINTS / VWPTS |
| Import points / Export points | IMPORTPOINTS / EXPORTPOINTS |
| Point Groups | Ribbon Survey → Groups |
| Surfaces | Ribbon Survey → Surfaces |
| Traverse Editor | Ribbon Survey → Traverse |
| Quick Select | QUICKSELECT / QS |
| Selection panel | Status bar SEL |
| Align results | Automatically, once ALIGN has pairs |
| PDF Attach | PDFATTACH / PA |
| Page Setup Manager, Viewports, Move or Copy | Right-click a layout tab |
| Batch Plot | Layout ribbon → Batch |
| Right-click Customization | Settings → User Preferences |