Object Snaps
Object Snaps
Object snap (OSNAP) pulls the cursor onto exact features of existing geometry, so a picked point lands on a real endpoint or intersection instead of near it.
Turning snap on and off
| Method | Notes |
|---|---|
F3 |
Toggles OSNAP. Works even while you are typing in the command line, because it is a mode key rather than a character |
Status bar OSNAP button |
Same toggle; the button is lit when snap is on |
| Settings → Drafting → Enable object snap | Same setting |
Choosing which snaps are active
Right-click the OSNAP button on the status bar for a checklist, or open
Settings → Drafting. Both edit the same eight toggles.
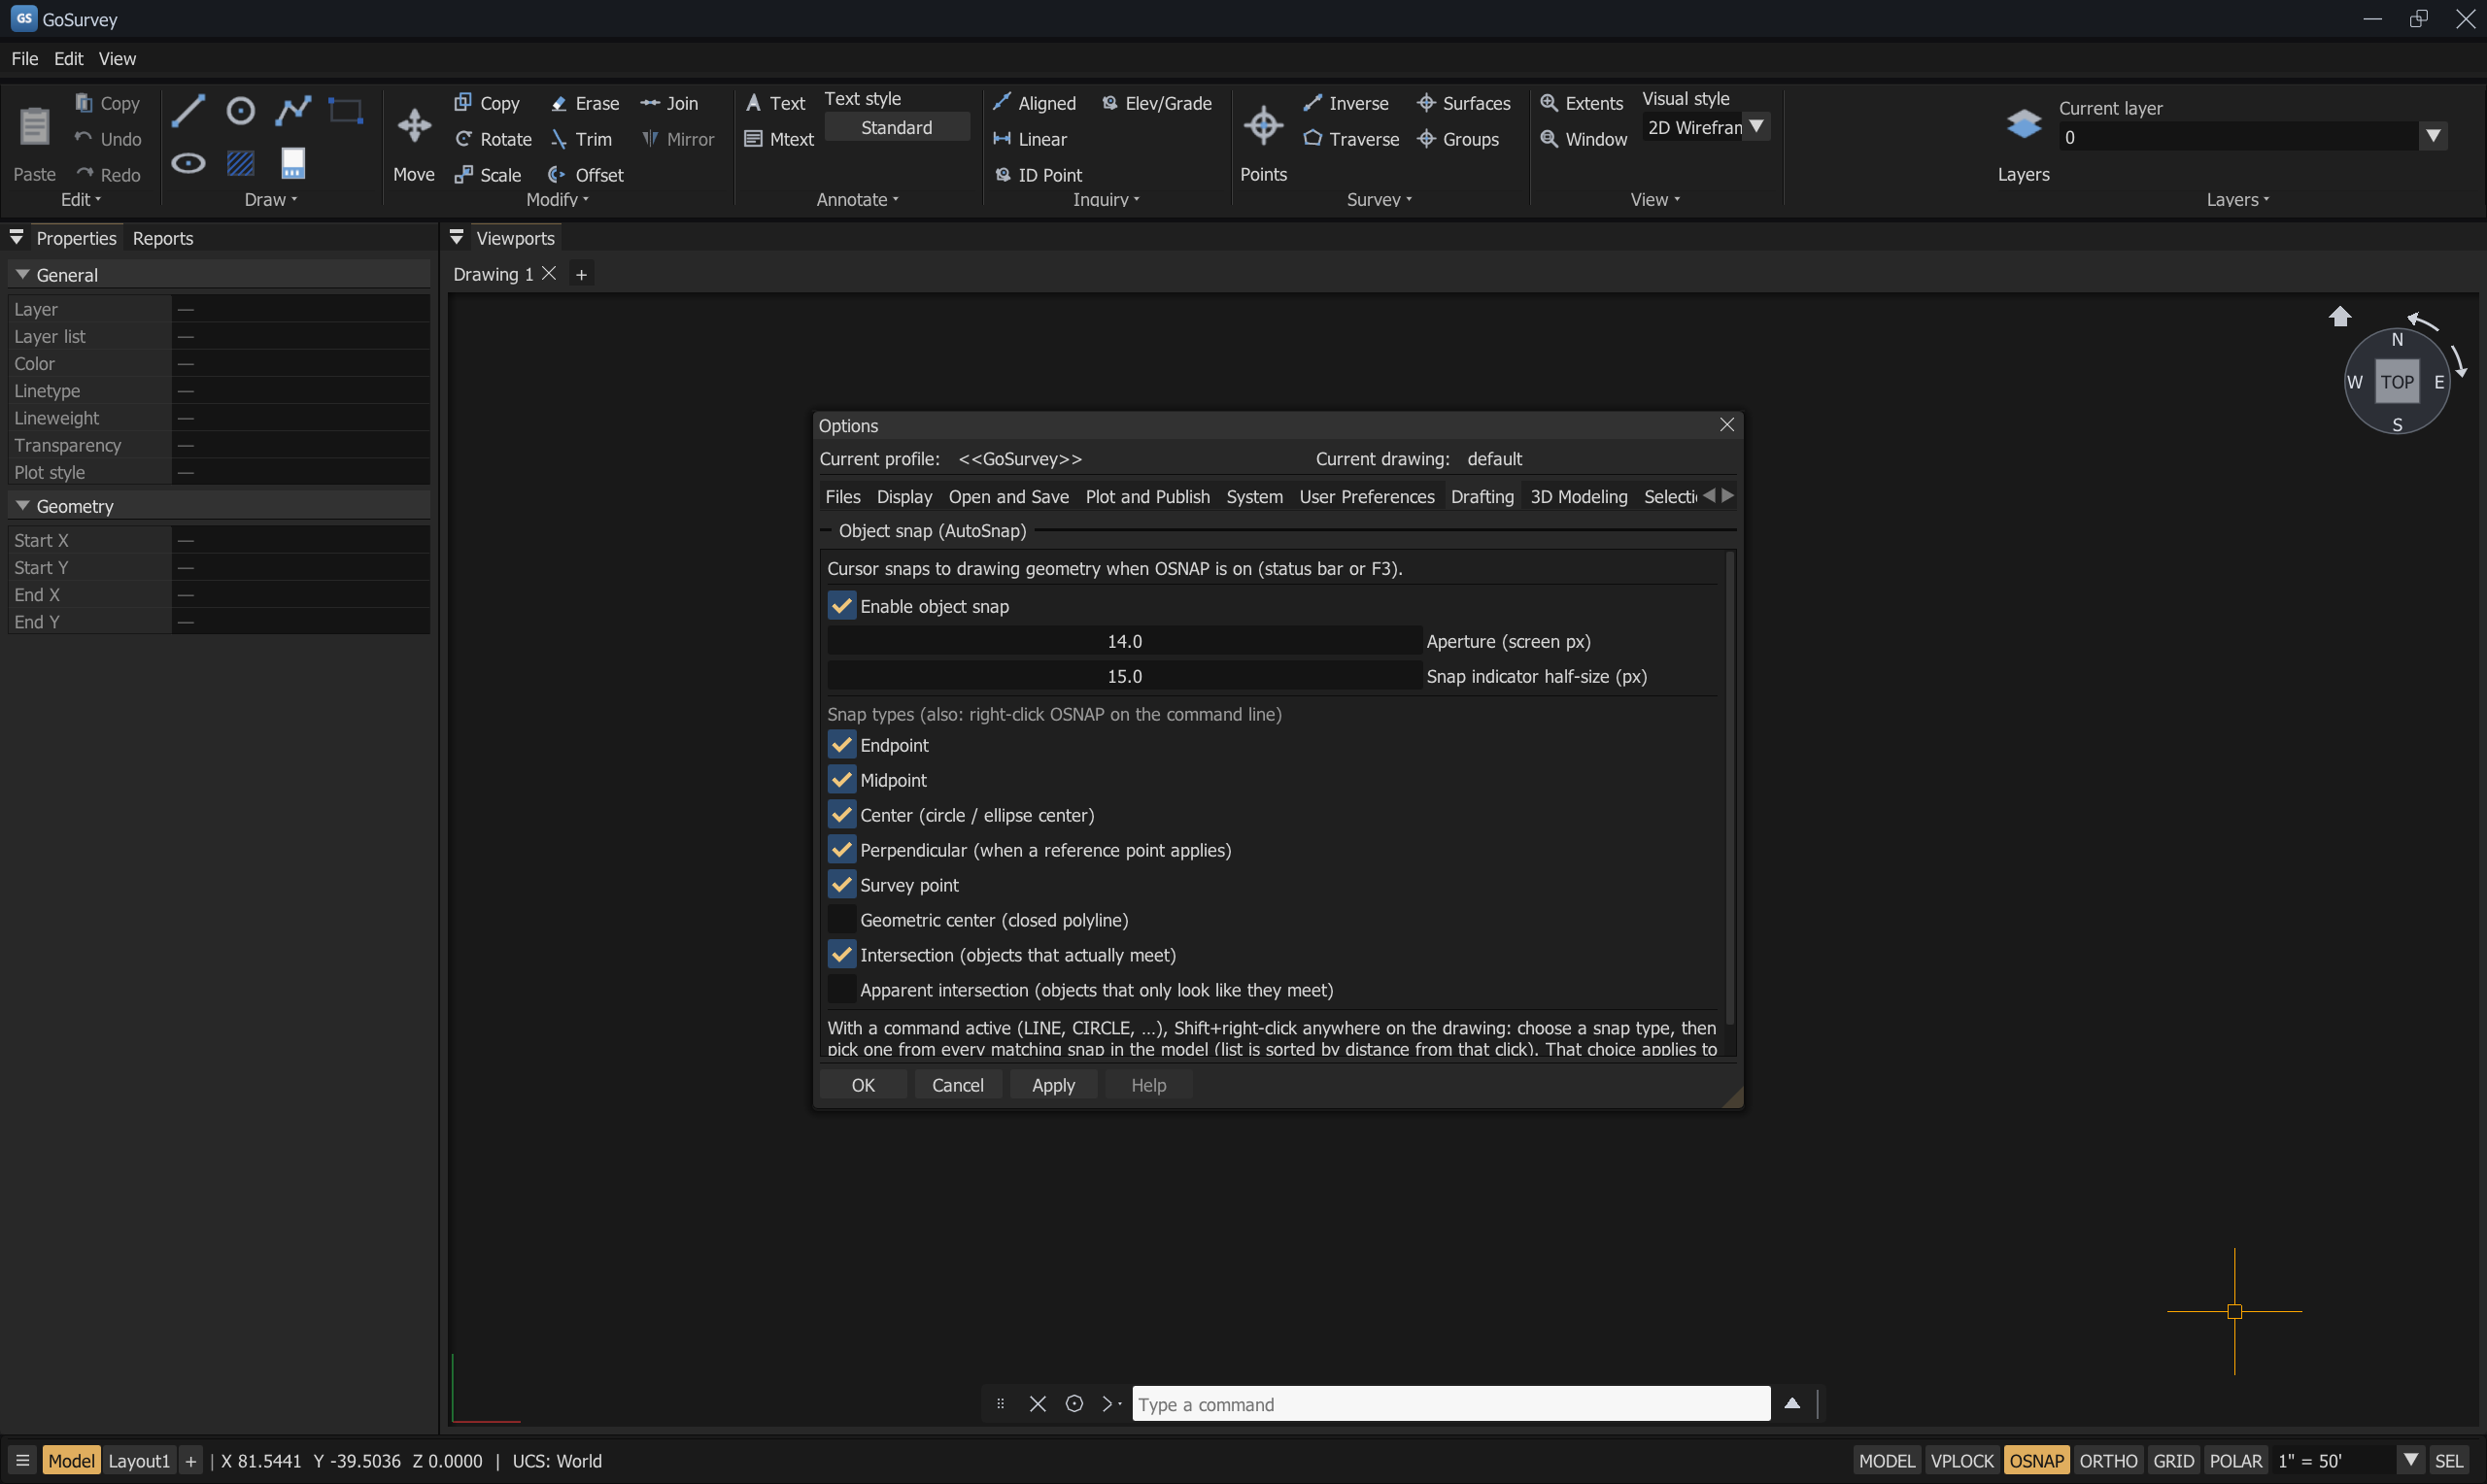
| Snap | Snaps to | Default | Priority |
|---|---|---|---|
| Endpoint | The ends of lines, arcs, polyline segments | On | Highest |
| Intersection | Points where two objects genuinely meet in 3D — their paths cross in plan and their elevations agree there | On | Highest |
| Center | The centre of a circle or ellipse | On | High |
| Survey point | The marker position of a survey point | On | High |
| Midpoint | The middle of a line or polyline segment | On | Medium |
| Geometric center | The centroid of a closed polyline | Off | Medium |
| Apparent intersection | Points where objects cross as seen in the current view but need not meet in space | Off | Medium |
| Perpendicular | The foot of a perpendicular from a reference point onto an object | On | Lowest |
Geometric center and Apparent intersection ship off — if you want either, tick it first.
Two related settings live in Settings → Drafting: Aperture (screen px) (default 14.0), how near the cursor must be for a snap to be offered, and Snap indicator half-size (px) (default 15.0), the size of the glyph drawn at the candidate.
When two candidates are equally close, the higher-priority one wins. Grips of selected objects beat every geometry snap and work regardless of the OSNAP toggle; no glyph is drawn for them.
Intersection versus apparent intersection
This distinction matters as soon as a drawing has elevations.
- Intersection is a real crossing: the two objects meet in space. This is as precise a feature as an endpoint, and is ranked as such.
- Apparent intersection is a crossing in the current view only. Two lines at different elevations look like they cross in plan view; they do not touch. Where the two candidate points differ, the one nearer the camera is offered.
A plan view cannot distinguish the two. Orbit the model (ORBIT) and the difference becomes
obvious. If you are working in 3D and want only genuine intersections, turn Apparent
intersection off.
Perpendicular
Perpendicular only fires when the running command supplies a reference point to be perpendicular from — the previous LINE point, the circle centre while sizing a radius, an earlier 3-point pick, and so on. Without a reference there is nothing to be perpendicular to, and the snap offers nothing.
One-shot snap override
Shift + right-click in the viewport opens the Snap once — choose type menu.
- Pick a snap type from the list. Only the types you have enabled appear, and Perpendicular appears only when the running command has a reference.
- The menu then lists every snap of that type in the model, sorted by distance from where you clicked — not just the ones near the cursor.
- Click one to use it for this single pick.
Back returns to the type list. If there are none, the menu says "No matching snaps in the current geometry."
This is how you reach a snap that is buried under other geometry, or one that is off screen.
Snapping to PDF underlays
Object snap also works on attached PDFs. Snap targets are found by analysing the rendered raster image rather than the internal PDF path structure, so snap fires at the geometry you can actually see.
| Target | How it is recognised |
|---|---|
| Endpoints | Line ends and stroke terminals — one foreground neighbour in the raster topology |
| Corners | Bends and junctions where two lines meet at an angle — two non-opposite neighbours |
| Junctions | T-intersections and crossings — three or more neighbours |
| Midpoints | On detected PDF line segments |
| Perpendicular | On detected PDF line segments |
Candidates are filtered through a visibility mask, so only points in areas with visible content are offered.
Each attachment has its own snap toggles — Lines, Circles, Text — on the PDF Underlay ribbon section and in the Properties panel. See PDF Underlays.
Why raster-based — GIS exports, scanned drawings, and other dense PDFs routinely contain internal path objects that do not correspond to visible line geometry. Reading the rendered image is what makes snap land on what you see.
Snap and the commands that ignore it
A few operations deliberately use the unsnapped cursor, because a nearby snap point would drag a corner off target:
DELETEselection windowsZOOMWINDOWcorners
Preview versus commit
Rubber-band previews follow the cursor; the pick commits at the snapped point. These are not always the same place — hover just inside the rim of a circle with Center enabled and the preview shows the rim while the commit takes the centre.
If a result lands somewhere unexpected, look at the snap glyph before you click: the glyph marks where the pick will actually go.
Common problems
| Problem | Cause | Solution |
|---|---|---|
| Nothing snaps | OSNAP is off | Press F3, or click the status-bar OSNAP button |
| It snaps, but never to the feature I want | That snap type is unticked | Right-click OSNAP and tick it |
| It keeps grabbing the wrong feature | Two candidates are close and the wrong one has higher priority | Use Shift + right-click for a one-shot override |
| Perpendicular offers nothing | The command has no reference point | Perpendicular needs a previous point; start from one |
| Lines that cross in plan will not give an intersection | They are at different elevations, so it is an apparent intersection | Enable Apparent intersection, or orbit to check the elevations |
| A snap marker floats away from the geometry when I orbit | Not a defect — the glyph is drawn at the snapped point's own elevation | Confirm the elevation in the status-bar readout |
Related
Coordinate Input · Drafting Aids · PDF Underlays · Object Selection